
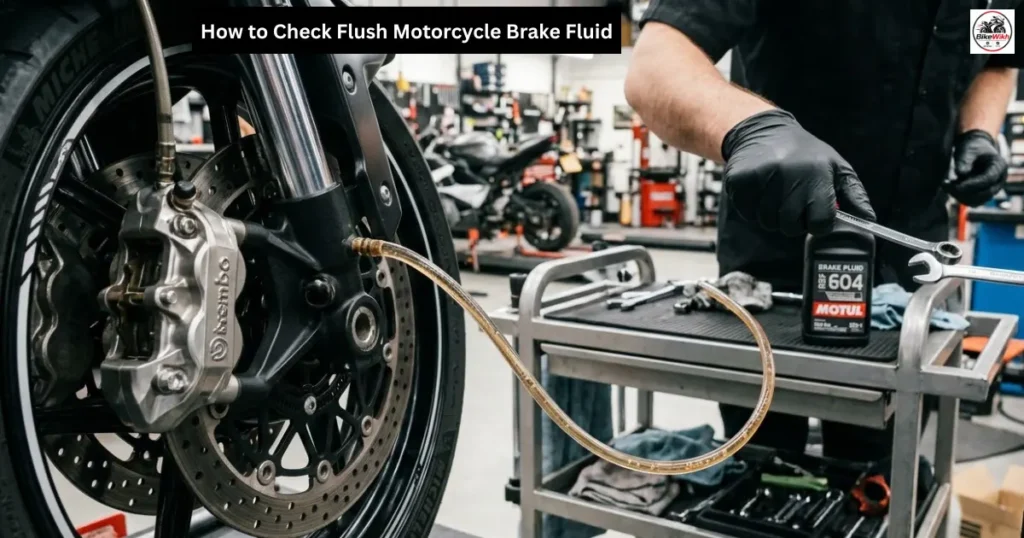
How to Check Flush Motorcycle Brake Fluid: When evaluating critical motorcycle safety parameters, your hydraulic braking system rests at the absolute top of the checklist. While riders frequently track brake pad wear limits or inspect tire treads, the actual chemical fluid operating inside the master cylinders is routinely neglected until braking performance drops dangerously low. For streetfighters, heavy cruisers, and adventure tourers traveling fast US interstate highways, maintaining pristine hydraulic brake fluid is the only line of defense against sudden brake fade.
Motorcycle brake fluid is intensely hygroscopic, meaning it actively absorbs ambient humidity straight through the microscopic pores of your flexible rubber brake lines over time. When water contaminates your hydraulic reservoir, it slashes the boiling point of the chemical mixture. During hard braking down steep canyon roads, this trapped water turns into gas bubbles, resulting in a spongy lever feel and a complete loss of stopping power.
In this comprehensive BikeWikh maintenance guide, we break down how to read your reservoir site markers, identify fluid contamination, and safely perform a step-by-step DIY brake fluid flush at home.
How to Check Flush Motorcycle Brake Fluid: Understanding Brake Fluid Ratings: DOT 4 vs. DOT 5.1
Before adding any chemical products to your handlebars, check your reservoir cap to confirm the exact required specification stamped into the plastic.
- DOT 4 (The Industry Standard): The most common fluid specification for modern motorcycles. It features a high dry boiling point and must never be mixed with silicone fluids.
- DOT 5.1 (High Performance): A glycol-based fluid that shares the same chemistry as DOT 4 but offers an exceptionally high boiling threshold for extreme track day workloads. It can be safely mixed with DOT 4 lines.
- DOT 5 (The Outlier): A pure silicone-based fluid used in specific vintage cruisers. Crucial Rule: DOT 5 is completely incompatible with DOT 4 and 5.1 systems. Mixing them causes the fluid to turn into a thick gel that completely freezes your internal caliper pistons.
Critical Paint Safety Warning: Shield Your Fairings!
THE GOLDEN BRAKE CLEANING RULE: Glycol-based brake fluids (DOT 4 and DOT 5.1) act like a highly destructive chemical solvent on contact with paint and plastics. If you spill a single drop on your fuel tank or front fairings, it will permanently melt the clear coat and ruin the paint finish within 60 seconds. Always wrap your entire handlebar area, fuel tank, and side body panels completely in heavy-duty shop towels or plastic sheets before opening the reservoir caps. Keep a spray bottle of soapy water handy to instantly neutralize any accidental spills.
Step-by-Step Brake Fluid Service Framework
Step 1: Evaluate Fluid Level and Discoloration
Park your motorcycle on flat ground and turn the handlebars until the master cylinder reservoir sits completely level. Look straight through the transparent sight glass window or the plastic reservoir body.
- The Level Check: The fluid line must sit comfortably between the Upper and Lower boundary markers. A rapid drop indicates either severe brake pad wear or an active hydraulic line leak.
- The Color Check: Fresh brake fluid should look clear or light amber-gold. If the fluid inside your window looks dark brown, cloudy, or has black sediment flakes settling at the bottom, it is completely contaminated with water and must be flushed immediately.
Step 2: Set Up the Caliper Bleed Line
Move down to the front brake caliper assembly. Pop the small rubber protective dust cap off the metal bleed nipple valve. Take a clean piece of clear vinyl tubing (typically 1/4-inch diameter) and push it tightly onto the bleed valve nozzle. Drop the other open end of the tube into a clean plastic catch bottle filled with a small layer of old brake fluid to prevent air bubbles from traveling backward into the line.
Step 3: Access the Master Cylinder Reservoir
With your fuel tank completely draped in protective shop towels, take a screwdriver and carefully remove the two small screws holding the handlebar reservoir top cap. Remove the plastic lid and pull out the soft internal rubber diaphragm accordion gasket. Use a clean syringe or paper towel to gently suck out the old, dirty fluid from the reservoir cup, being careful not to empty it completely to avoid trapping air in the main piston bore. Refill the cup to the brim with fresh, sealed DOT 4 fluid.
Step 4: Perform the Pump and Bleed Sequence
This mechanical sequence uses hydraulic pressure to flush old fluid out while preventing external air pockets from entering the closed system.
Squeeze and hold the handlebar front brake lever down firmly with your right hand.
While keeping steady pressure on the lever, use an open-ended wrench to crack open the caliper bleed valve by a quarter-turn. You will immediately see dirty, dark fluid rush through the clear vinyl tube into your catch bottle.
The brake lever will collapse completely toward the handlebar grip. Do not let go of the lever!
Tighten the caliper bleed valve securely back down.
Once the valve is locked, slowly release your grip on the handlebar brake lever.
Repeat this exact cycle 10 to 15 times. Keep a close eye on your handlebar reservoir cup and top it up with fresh fluid every few pumps. If the fluid level drops to the absolute bottom, the system will suck in air, requiring an arduous bleeding process to fix. Stop cycling once you see bright, crystal-clear golden fluid flowing through the clear vinyl tube with zero tiny air pockets.
Step 5: Final Top Off and Closure
Lock the caliper bleed valve tightly to factory torque specifications. Wipe any fluid residue off the caliper nozzle using brake cleaner spray. Return to the handlebars, top up the master cylinder reservoir until the fluid line sits right below the Max marker, slide the rubber diaphragm back in cleanly, and bolt the top cap down firmly. Pump the brake lever 5 times to confirm it feels rock-hard and responsive.
How to Check Flush Motorcycle Brake Fluid: Brake Fluid Degradation Tracking Matrix
| Fluid Visual Color | Water Contamination Percentage | Hydraulic System Behavior | Required Garage Action |
|---|---|---|---|
| Clear / Pale Gold | Less than 1% (Excellent) | Firm lever feel, immediate stopping bite | No action required; safe for highway travel |
| Dark Amber / Orange | 2% to 3% (Moderate) | Progressive, soft lever stroke under heavy heat | Plan for a fluid service within the month |
| Dark Brown / Black | Over 4.5% (Critical) | Spongy lever, high risk of complete brake fade | Stop riding immediately; perform a full line flush |
Conclusion
Mastering a DIY hydraulic brake fluid flush eliminates spongy lever lag and ensures your sportbike or cruiser retains maximum stopping power under extreme thermal loads. By utilizing clear vinyl tracking tubes, keeping your master cylinder cup topped up continuously, and wrapping your painted fairings in protective shop towels, you keep your system running cleanly without expensive dealer invoices. Check your fluid window colors monthly, choose premium silicate-free weights, and enjoy safe, crisp braking feedback on every single interstate run!