
How to Align a Motorcycle Rear Wheel: When it comes to completing routine final-drive garage service, most riders naturally focus all their attention on cleaning away road grime and spraying fresh lubricant onto the links. While a clean chain is incredibly important, there is another critical drivetrain geometric setting that is routinely neglected during basic garage maintenance: rear wheel chain alignment. Whenever you adjust your motorcycle’s chain slack to remove structural sag, you are actively sliding the entire rear axle assembly along the swingarm channels.
If you tighten the adjustment bolts unevenly by even a fraction of a millimeter, your rear wheel will sit crooked inside the chassis frame layout. Operating a motorcycle with a misaligned rear wheel creates intense frictional drag that saps fuel economy (MPG), accelerates uneven tire tread wear, grinds down sprocket teeth, and can cause the drive chain to climb the sprocket teeth and dangerously derail at highway speeds. Fortunately, verifying and locking in a perfectly straight rear axle alignment is a highly manageable, 15-minute DIY task you can perform at home with simple hand tools.
In this comprehensive BikeWikh maintenance blueprint, we break down how to read swingarm factory stamps accurately, cross-reference adjustments with physical measurement tools, and safely torque down your axle blocks.
How to Align a Motorcycle Rear Wheel: The Core Mechanical Risk of Misalignment
Before gathering your wrenches, you must understand the mechanical toll a crooked rear axle takes on your drivetrain. Your front engine sprocket and your rear wheel sprocket must sit in a perfectly straight line to allow the chain to glide smoothly over the teeth without resistance.
When the rear wheel sits unaligned:
Accelerated Sprocket Hooking: The inner metal link plates of your chain will aggressively grind against one side of the sprocket teeth, quickly wearing them down into sharp, hooked shapes that require a complete component replacement.
Dangerous Handling Instabilities: Because the rear tire is not tracking perfectly parallel to the front tire, the motorcycle will pull slightly to one side when cruising straight down the highway, resulting in unpredictable cornering dynamics when leaning into canyon curves.
Essential Tools Checklist
- Metric Socket Wrench Set: Necessary to loosen the main rear axle nut (typically between 19mm and 32mm).
- Open-Ended Alignment Wrenches: To turn the fine adjustment bolts at the rear tips of the swingarm.
- A Precision Measuring Tool: Either a metric vernier caliper, a specialized motorcycle chain alignment laser tool, or a basic mechanical alignment rod tool.
- A Heavy-Duty Torque Wrench: Essential to tighten the rear axle nut safely back to factory specification limits.
Step-by-Step Rear Wheel Alignment Framework
Step 1: Secure the Bike and Loosen the Main Axle
Park your motorcycle on completely level, stable ground using a center stand or a rear paddock stand. Place the transmission in Neutral. Take your large socket wrench and loosen the main rear axle nut by two or three full turns. You do not need to slide the axle bolt completely out; you only want to break the factory torque tension so the adjustment blocks can slide smoothly forward or backward along the swingarm tracks.
Step 2: Set Your Primary Chain Tension
Locate the small alignment bolts and threaded locknuts at the absolute rear tip of the swingarm on both sides. Turn the left-side alignment bolt clockwise in small, quarter-turn increments to move the axle backward until your metric ruler confirms your chain slack sits perfectly in the factory sweet spot (typically 25mm to 35mm of total free play).
Step 3: Execute the Dual-Side Alignment Audit
Now, you must match the right-side axle block position to the left side with absolute precision. Do not rely strictly on your theme’s stamped factory notches, as these metal stamps can carry minor manufacturing variances from the factory. Choose one of these three precision checking methods:
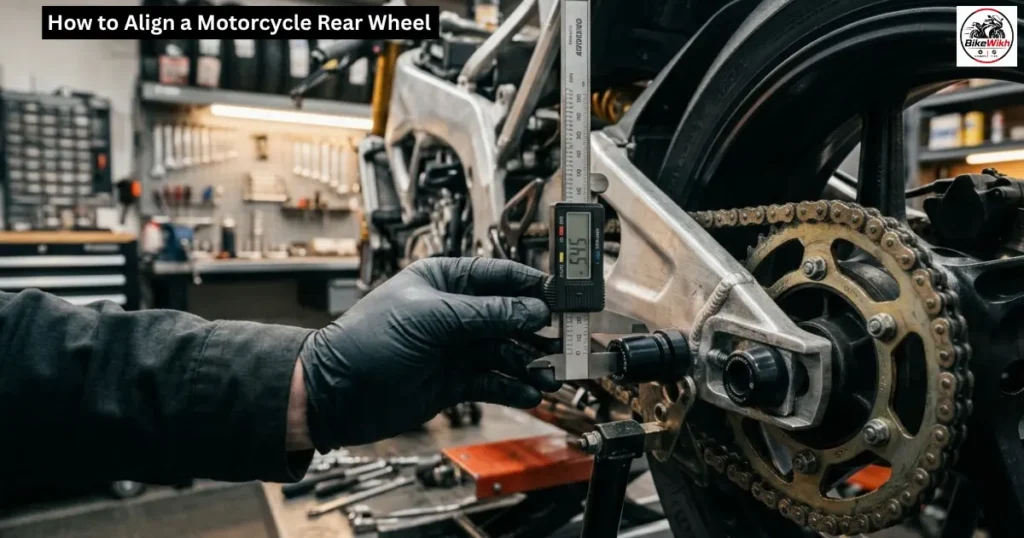
- Method A (The Caliper Method – Highly Recommended): Take your digital vernier caliper tool and measure the exact distance from the very rear edge of the swingarm frame to the flat rear face of the axle slider block on the left side. Move to the right side and turn the adjustment bolt until your caliper display screen registers the exact same millimeter measurement down to the decimal point.
- Method B (The Laser Guide Method): Clamp a small motorcycle chain alignment laser tool directly onto the rear sprocket face. Shine the laser beam forward along the length of the chain. Adjust your right-side adjustment bolts until the glowing laser line runs perfectly straight down the center of the metal roller links without shifting to the left or right edges.
- Method C (The Alignment Rod Method): Insert a specialized alignment tool pin through the center hole of the swingarm pivot axle and measure the distance straight back to the center point of the wheel axle. Ensure the distance matches perfectly on both sides.
Step 4: Seat the Axle Blocks and Torque to Specification
Once your measurements confirm both sides are identical down to the millimeter, you must physically “seat” the axle before tightening the main nut. Take a clean screwdriver or shop rag and wedge it firmly between the top of the chain and the rear sprocket teeth. Rotate the rear wheel backward by hand until the chain tightens aggressively against the tool. This mechanical force pulls the rear axle sliders firmly forward against the adjustment bolts, preventing the alignment from shifting while you work.
While keeping the chain wedged, take your heavy-duty torque wrench and tighten the main rear axle nut back down to your factory setting specification (typically between 60 to 90 lb-ft depending on your manual details). Remove the wedged rag from the sprocket.
Step 5: Final Play Verification Pass
Spin the rear tire slowly by hand in a forward direction. Listen closely to the drivetrain behavior. The chain should glide cleanly across the sprocket teeth smoothly and silently, without producing clicking or grinding sounds. Re-verify your chain slack layout with your ruler one last time to ensure tightening the axle did not alter your primary adjustments.
How to Align a Motorcycle Rear Wheel: Drivetrain Alignment Performance Scorecard
| Alignment Accuracy | Real-World Mechanical Behavior | Impact on Drivetrain Lifespan | Immediate Garage Action |
|---|---|---|---|
| Perfect Laser Alignment | Silent chain glide, balanced handling, optimal fuel economy | Maximum chain and sprocket lifespan parameters | No action required; safe for highway cruising |
| Minor Alignment Drift | Light clicking noise from sprocket, subtle rear tire wander | Accelerated outer sprocket tooth wear pattern | Loosen axle and micro-tune using digital calipers |
| Severe Misalignment | Intense mechanical grinding, heavy chain slapping, tyre drag | High risk of chain snapping or rear derailment | Stop riding immediately; execute a full system realignment |
Conclusion
Mastering a DIY motorcycle rear wheel alignment completely eliminates excessive drivetrain friction, guarantees balanced high-speed cornering manners, and extends the operational lifespan of your chains, sprockets, and rear tire tread compounds. By tracking your alignment block clearances using digital calipers or laser guides weekly, turning adjustment nuts in equal micro-increments systematically, and seating your axle slider blocks using the sprocket-wedge method ahead of final torquing, you protect your machine from catastrophic derailment failures. Keep your alignment threads lubricated, check your swingarm notch accuracy metrics before every cross-country tour, and enjoy immediate, smooth, and balanced power transfer on every single interstate run!