How to Test a Motorcycle Battery: There is no mechanical feeling more frustrating than gearing up for an early morning weekend ride, swinging your leg over the saddle, flipping the ignition switch, and hearing nothing but a weak, rapid “click-click-click” from under your seat. A dead or dying battery is one of the most common electrical faults across the powersports world. Because motorcycle batteries are small, compact, and highly sensitive to ambient temperature swings or prolonged periods of storage, they require consistent monitoring to ensure they deliver the high cranking amps needed to turn over a high-compression engine block.
Rather than throwing money blindly at a brand-new replacement battery or calling an expensive towing service, you can diagnose your entire charging system at home in less than 15 minutes.
In this comprehensive BikeWikh garage blueprint, we walk you through the essential tools needed, how to perform a static voltage test, how to execute a proper engine cranking load test, and how to spot a failing stator or regulator-rectifier.
How to Test a Motorcycle Battery: Essential Diagnostic Tools Checklist
You do not need an expensive garage setup to master basic motorcycle electrical troubleshooting. Grab these few basic items:
- Digital Multimeter: A simple, low-cost digital meter capable of reading Direct Current Voltage (DCV) up to 20 volts.
- Safety Glasses & Nitrile Gloves: Protects your eyes and skin from highly corrosive battery acid film or unexpected sparks.
- Hand Tools (Screwdriver or Socket Set): For removing your motorcycle seat bodywork panels and loosening terminal bolts.
- Wire Brush or Fine Sandpaper: For cleaning away green or white powdery corrosion crust from metal terminal contacts.
- Smart Battery Tender / Charger: A microprocessor-controlled maintenance charger (like a Battery Tender or NOCO Genius) to safely revive low cells.
1. The Static Voltage Test: Checking State of Charge
A static voltage test measures the electric potential stored inside your battery cells while the motorcycle engine is completely turned off and the ignition key is out.
Step 1: Access the Battery Terminals
Locate your motorcycle battery. Depending on your specific model, it
is typically tucked safely beneath the rider’s main saddle or hidden behind a removable side fairing plastic panel. Remove the retaining bolts, slide the protective rubber boots off the terminals, and inspect the metal leads. If you spot green or white crusty oxidation buildup, scrub the terminals clean with a wire brush before testing.
Step 2: Configure Your Multimeter
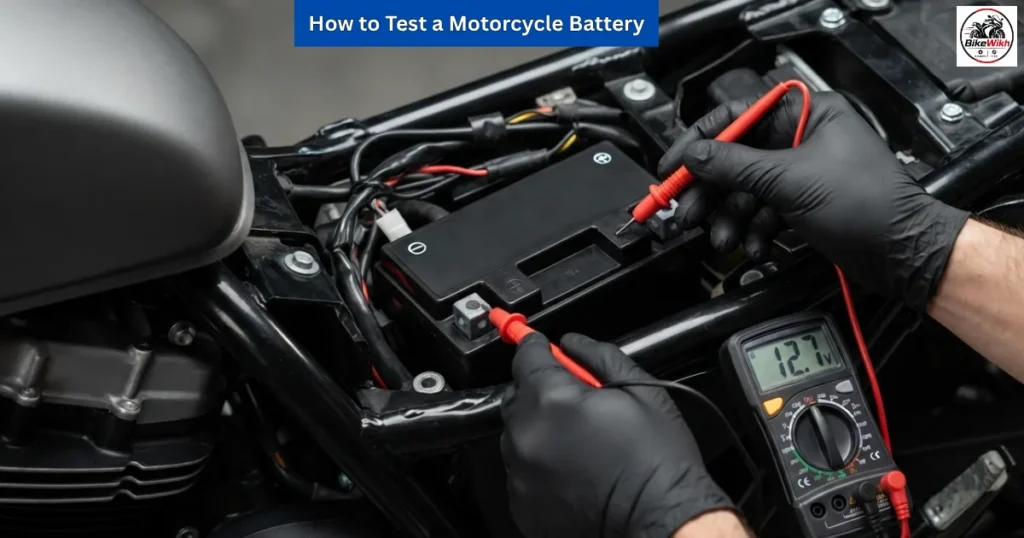
Turn your digital multimeter dial to the DC Voltage (DCV) setting, specifically selecting the 20V range marker. Plug your red testing probe into the positive (+) port on the meter and the black testing probe into the common negative (-) port.
Step 3: Connect and Read the Screen
Touch the Red Probe directly to the Positive (+) battery terminal block and the Black Probe directly to the Negative (-) battery terminal block. Read the static digital number displayed on your screen:
- 12.6V to 12.8V: The battery is healthy and completely charged at 100% capacity.
- 12.2V to 12.4V: The battery is partially discharged (roughly 50% capacity) and needs to be hooked up to a smart battery charger immediately.
- 12.0V or Lower: The battery is completely dead. It likely has suffered internal sulfate damage and may not hold a charge safely.
2. The Engine Cranking Load Test: Measuring Real Power
A battery can look perfectly healthy on a static voltage test while failing completely under load. A load test checks if the battery can maintain enough electrical pressure to spin the heavy starter motor.
Keep Probes Connected: Leave your digital multimeter probes securely touched against the positive and negative battery terminals.
Watch the Screen and Crank: Flip your motorcycle kill switch to the “Run” position and firmly press the starter button. Watch the digital multimeter display closely the exact millisecond the starter motor spins.
Analyze the Voltage Drop:
Stays Above 9.6 Volts: The battery is healthy, holding active load parameters perfectly, and should deliver solid cranking power.
Drops Below 9.6 Volts: The internal plates are weak, degraded, or shorted out. The battery lacks the physical strength to run your starter and must be replaced immediately.
3. Testing Your Charging System (Stator & Regulator)
If you replace a dead battery with a brand-new unit, a broken onboard motorcycle charging system will drain it flat within a few hours of road riding. Here is how to make sure your bike is actively charging itself.
With the motorcycle engine safely running and idling in Neutral, rev the throttle steadily up to roughly 3,000 to 4,000 RPM while tracking your multimeter screen.
[ Idle RPM ] ========> Screen Reads: 13.5V to 14.5V ======> Stator & Regulator Healthy! [ High RPM ] ========> Screen Reads: Stays Below 13.0V ===> Stator is Failing (Undercharging) [ High RPM ] ========> Screen Reads: Spikes Above 15.0V ==> Regulator Broken (Overcharging)
If your multimeter screen shows less than 13.0V while revving, your engine is running purely off battery reserves, pointing to a burnt stator winding coil. If the reading spikes uncontrollably past 15.0V, your regulator-rectifier has failed internally, which will cook your battery cells, boil the acid out, and instantly destroy your bike’s expensive electronic ECU.
How to Test a Motorcycle Battery: Summary Battery Diagnosis Matrix
| Multimeter Test Metric | Exact Reading Found | System Diagnosis Condition | Corrective Maintenance Action Needed |
|---|
| Static Voltage | 12.1 Volts | Heavily Discharged | Hook up to a Smart Charger for 12 hours |
| Cranking Load | Drops to 8.2 Volts | Bad Internal Cells | Replace Battery Immediately |
| Engine at 4,000 RPM | 14.2 Volts | Perfect Charging | None (System working cleanly) |
| Engine at 4,000 RPM | 15.6 Volts | Voltage Regulation Fault | Replace Regulator-Rectifier instantly |
Conclusion: Routine Testing Saves Future Rides
Investing a few minutes into tracking your electrical vitals ensures your bike fires up reliably every time you hit the starter. By incorporating a quick voltage audit into your regular oil change schedules, checking metal terminals for power-robbing corrosion crust, and ensuring your regulator holds continuous alternator output under 14.5 volts, you safely maximize your electrical system’s lifespan. Keep your digital multimeter tucked neatly inside your tool cabinet, monitor your winter storage charging logs, and keep your browsers locked onto BikeWikh for more expert DIY maintenance blueprints!
I live and breathe motorcycles. From carving technical canyon curves to tearing up remote weekend dirt trails, my life revolves around two wheels. I started BikeWikh to cut through corporate marketing fluff and bring riders honest, real-world reviews and practical garage tips. Whether you are a beginner picking your first machine or a veteran rider planning an interstate road trip, I am here to help you gear up and ride smart.