bleed motorcycle hydraulic brakes: In the entire spectrum of motorcycle maintenance parameters, there is no system more directly tied to your physical riding safety than your hydraulic brakes. Your engine’s horsepower and torque capabilities determine how fast you can accelerate down an open highway, but your braking components are the sole line of defense responsible for shedding that kinetic energy during an emergency stopping event. Over months of hard riding, your brake levers can begin to feel spongy, soft, or lose their immediate bite point, forcing you to pull the lever closer to the handlebar grid just to slow the machine down.
This dangerous loss of braking performance is almost always caused by trapped air bubbles or moisture contamination inside your sealed hydraulic fluid lines.
In this comprehensive BikeWikh garage guide, we break down the exact step-by-step DIY sequence to safely flush your fluid lines, bleed out trapped air pockets, and restore a rock-solid lever feel right in your home workshop.
bleed motorcycle hydraulic brakes: Why Hydraulic Brake Fluid Suffers Performance Degradation
To understand why bleeding your brakes is essential, you must understand the chemical nature of modern brake fluid. The vast majority of street bikes, cruisers, and adventure platforms run on glycol-based DOT 3, DOT 4, or DOT 5.1 brake fluids. These fluids are highly hygroscopic, meaning they act like a sponge, actively absorbing moisture from the ambient humidity in the air over time.
As moisture seeps past the rubber master cylinder seals and mixes into the fluid lines, it drastically lowers the fluid’s boiling threshold. Under heavy braking down steep mountain canyon roads, the intense friction heat generated between your brake pads and rotors transfers straight into this contaminated fluid. The microscopic moisture droplets instantly boil into gas vapor pockets. Unlike liquid, gas is highly compressible. When you squeeze the brake lever, your physical hand pressure simply compresses that trapped air pocket rather than pushing the hydraulic fluid directly against the caliper pistons, resulting in a terrifying “fading” lever feel.
Preparing Your Workshop and Assembling the Tools
Before you remove the reservoir cover, you must take strict environmental precautions. Glycol-based brake fluid is an incredibly aggressive chemical solvent. A single stray drop spilled onto your motorcycle’s painted fairings, plastic windscreens, or fuel tank shrouds will permanently eat through the clear coat and dissolve your paint finish within minutes.
Cover your entire front end, fuel tank, and front fender with thick workshop towels or heavy plastic sheeting to catch any accidental drips. Keep a spray bottle filled with clean water and a microfiber rag nearby, as water instantly neutralizes brake fluid spills. Gather these basic garage tools on your workbench:
A bottle of fresh, factory-sealed brake fluid matching the exact DOT specification stamped on your reservoir lid. Never use an old bottle that has been sitting open on your shelf, as it is already contaminated with moisture.
A length of clear, flexible vinyl tubing cut to fit snugly over your caliper’s metal bleed nipple.
A clean glass jar or fluid catch container.
An appropriate box wrench or ring spanner to open the caliper bleed valve.
The Step-by-Step Manual Fluid Flushing Sequence
To ensure a flawless fluid flush without introducing extra air bubbles into your brake lines, execute this classic manual pumping sequence methodically:
Step 1: Position and Top Off the Master Cylinder
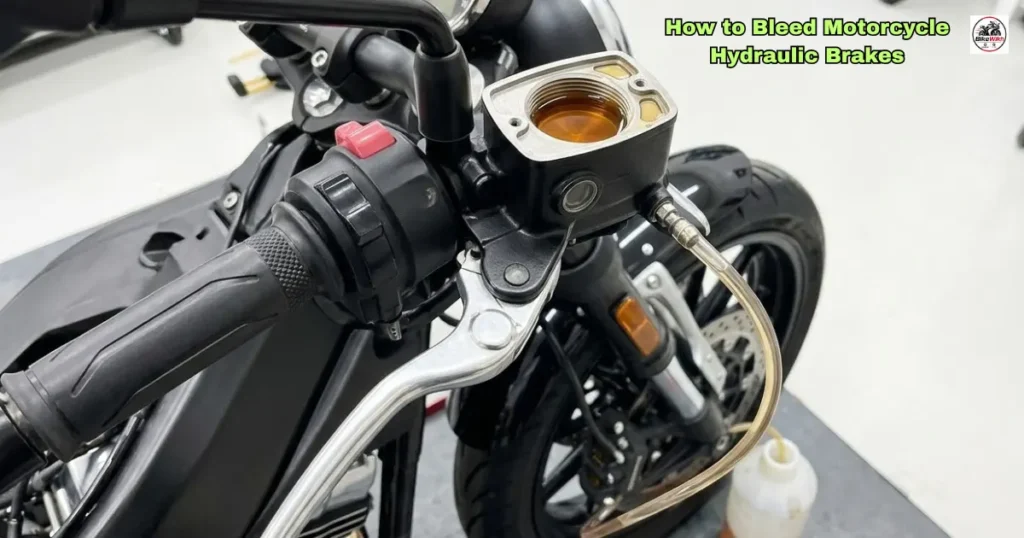
Turn your handlebars until your front brake master cylinder reservoir sits perfectly level with the ground. Wipe the outside of the reservoir lid completely clean to prevent dirt blocks from dropping inside, then unbolt the screws to remove the top cap and the internal rubber diaphragm. If the old fluid inside looks dark brown or black, use a clean syringe to suck out the old fluid, leaving just a thin layer at the bottom, and top it up to the brim with your fresh, clear fluid.
Step 2: Set Up Your Caliper Bleed Loop
Move down to the front brake caliper. Remove the protective rubber dust cap from the metal bleed nipple and slide your box wrench over the hex nut. Push one end of your clear vinyl tubing firmly onto the nipple, and submerge the other end of the tube into your glass catch jar filled with an inch of clean brake fluid. Submerging the tube prevents atmospheric air from being sucked backwards into the caliper during the bleed strokes.
Step 3: Squeeze, Open, Close, and Release
This is the core mechanical sequence that moves fluid through the system safely. Follow these four sub-steps precisely:
Squeeze: Pull the front handlebar brake lever slowly and firmly all the way to the grip, and hold it steady with your hand. Do not let go.
Open: While holding the lever tight, use your wrench to crack the caliper bleed nipple open by a quarter-turn. Old fluid and air bubbles will shoot down through the clear tube into your jar, and the brake lever will sink completely toward your handlebar grip.
Close: While the brake lever is still held completely pinned against the grip, immediately tighten the caliper bleed nipple back down until it seals.
Release: Once the bleed valve is closed tight, slowly release your grip on the handlebar brake lever to let it return to its resting position.
Step 4: Monitor the Reservoir and Repeat
Repeat this entire “Squeeze, Open, Close, Release” loop continuously. As you pump the dirty fluid out through the bottom caliper, the fluid level inside your top master cylinder reservoir will drop rapidly. Crucial Safety Alert: Monitor the reservoir level constantly and top it up with fresh fluid after every 4 to 5 pumps. If you let the reservoir run completely dry, the master cylinder will suck a massive pocket of air straight into the top of the brake line, forcing you to restart the entire process from scratch.
bleed motorcycle hydraulic brakes: Confirming a Successful Bleed and Reassembly
Continue executing the pumping loop until you see fresh, crystal-clear fluid running through your clear vinyl tube with absolutely zero tiny air bubbles popping out. Hold the brake lever down one final time, torque the caliper bleed nipple securely to factory specification, and slide the rubber dust cap back into position.
Top off your master cylinder reservoir fluid line until it reaches the upper level mark indicator. Reinsert the clean rubber diaphragm seal, press the plastic cap down, and bolt the reservoir lid securely. Clean away any residual fluid film from around the reservoir body using a damp cloth. Squeeze the brake lever hard; it should now feel incredibly firm, offering immediate mechanical resistance the moment you apply hand pressure.
Conclusion: Restoring Crisp Hydraulic Performance Saves Lives
Taking forty minutes to clear old, moisture-ridden fluid and trapped air blocks out of your hydraulic lines is the single most effective way to guarantee your motorcycle delivers immediate, predictable stopping power under stressful road conditions. Regular brake fluid maintenance keeps your caliper pistons moving smoothly and protects your expensive master cylinders from internal corrosion. Keep your browsers locked onto BikeWikh for more step-by-step DIY garage maintenance walkthroughs, honest safety gear reviews, and real-world advice to maximize your riding experience!