
Fix Sticky Motorcycle Throttle: There is an incredible amount of focus placed on braking systems and tire wear when it comes to routine two-wheel safety checks, but riders frequently overlook the single most direct connection between their right hand and the engine’s power grid. Your throttle assembly is responsible for modulating every single acceleration arc, highway passing maneuver, and low-speed clutch adjustment you make. Over months of tackling varying weather loops and dusty country lanes, that crisp, instantaneous snap-back sensation at the handlebar grip can begin to degrade. You twist the throttle to roll on the power, but when you let go, the grip lazily crawls back to its resting position or sticks completely in place.
A binding or sticky throttle line isn’t just an annoying mechanical inconvenience that robs you of precise engine control; it represents a massive, immediate safety hazard. If your throttle hang hooks up while you are trail-braking hard into a tight corner or filtering through dense highway gridlock, the machine will continue pulling forward against your will, easily leading to a dangerous loss of control. Tracing the internal friction points along your throttle assembly requires a methodical technical breakdown, but you can execute the entire refresh right at home using common garage hand tools.
Fix Sticky Motorcycle Throttle: Hunting Down the Core Friction Point
When a throttle grip fails to snap back cleanly when released, the mechanical drag is almost always isolated within three specific zones: the handlebar sleeve housing, the routing path of the inner braided steel line, or the mechanical return spring assembly mounted on the engine’s throttle bodies. To find the exact culprit, you have to break down the assembly piece by piece rather than blindly spraying lubricants into every opening you see.
Start by inspecting the physical handlebar environment. Over time, aftermarket bar-end weights, custom vibrating dampeners, or thick winter riding gloves can migrate inward, physically pinning the rubber edge of your throttle grip sleeve tightly against the metal housing block. Loosen your bar-end weight screws and slide the assembly outward by a fraction of an inch to see if the grip frees up immediately. If the outer sleeve clearance is perfectly clear, the binding is deeper inside the system.
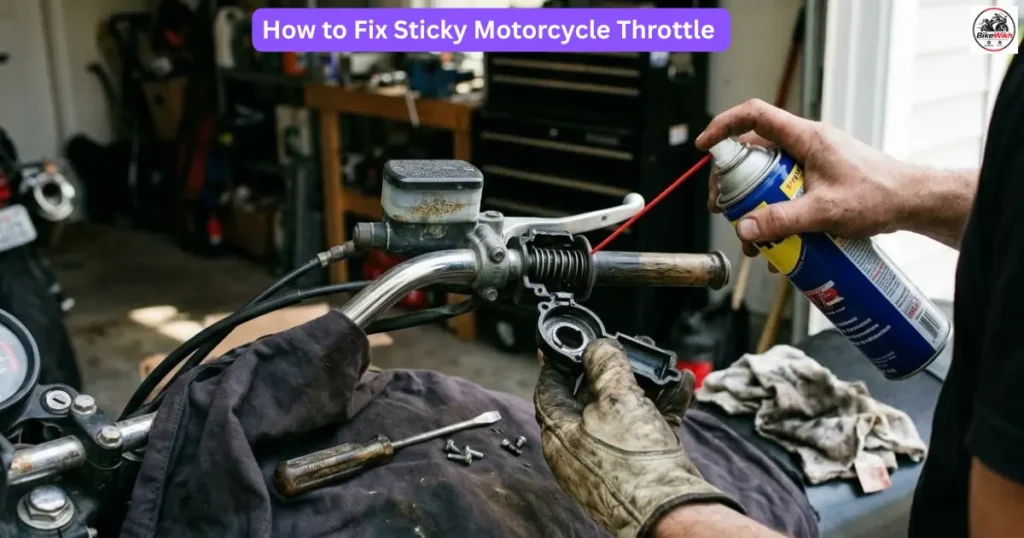
Next, use an Allen wrench to split the two halves of the plastic switch housing cluster clamped to the right clip-on bar. Lift the plastic throttle sleeve completely off the bare metal handlebar tube. This area is highly prone to collecting a nasty, crusty paste composed of old factory grease mixed with fine road dust. If the bare metal bar looks dry, rusty, or layered with black gunk, it will create massive rotational drag.
Clean both the metal handlebar surface and the inside of the plastic throttle sleeve using a lint-free rag saturated with a mild degreaser or isopropyl alcohol. Tech Tip: Never apply thick, automotive chassis grease or heavy wheel bearing paste to the bare handlebar tube. While it might feel smooth for a single afternoon, thick grease acts like a physical magnet for grit, creating a sticky slurry within a few weeks that binds up worse than before. Leave the plastic-on-metal interface completely dry, or use a micro-thin layer of specialized dry-film graphite powder to ensure frictionless movement.
Fix Sticky Motorcycle Throttle: Tracing Internal Cable Corrosion and Routing Kinks
If the handlebar sleeve turns beautifully on its own but the throttle cable wires still feel heavy and resistant when pulled by hand, the internal braided steel line is suffering from dry friction or physical cable fraying. Modern motorcycles typically utilize a dual-cable framework consisting of a dedicated pull cable to open the butterflies and a matching push cable to force the assembly closed if the mechanical return spring fails.
Examine the entire physical routing path of the twin cables as they snake downward from the clip-on bars, pass through the steering triple clamps, and dive beneath your main fuel tank shroud. If a previous owner executed a hurried spark plug swap or airbox filter replacement, they may have accidentally pinched the thick outer cable housing between the frame rails, creating a sharp structural kink. A sharp bend forces the inner braided steel wire to scrub violently against the internal Teflon liner, destroying the smooth slide dynamic. Reroute the lines so they flow in wide, natural sweeping arcs without binding when you turn the handlebars completely from lock to lock.
If the cable routing is perfectly straight, the inner wire needs targeted lubrication. Slide a specialized rubber cable luber tool over the bare metal end of the cable housing. Clamp the tool down tight and insert the straw of an aerosol cable lubricant into the input port. Spray the lubricant in short, controlled bursts until you see clean, clear fluid exiting out the opposite end of the wire down by the engine bay.
However, if your bike utilizes premium, modern Teflon-lined cables, check the manufacturer guidelines before using petroleum solvents. Harsh chemical sprays can cause certain internal synthetic coatings to swell and dissolve, permanently ruining the cable. If you flush the line and feel a distinct, rough catching sensation as you slide the wire back and forth, individual steel wire strands have fractured inside the housing. A frayed cable cannot be saved with lube; it will eventually snap completely, meaning the entire line must be pulled and replaced with a fresh factory unit immediately.
Auditing the Throttle Body Return Spring
The final checkpoint sits directly at the engine’s intake tract. If your handlebar controls are clean and your cables slide like silk, the mechanical drag is located at the linkage wheel governed by the main return spring. Road salt, water splashes, and engine grime can build up around the linkage pivot pin, causing the heavy return spring to lose its snappy tension limits.
With the cables completely disconnected from the engine linkage, use your fingers to manually rotate the throttle wheel wide open and let it drop. It should snap shut instantly with a loud, metallic clack. If it moves lazily or sticks halfway open, spray the spring pivot point with a dedicated electrical parts cleaner to wash away stubborn grease deposits. Follow up with a single drop of lightweight penetrating oil directly onto the central linkage bearing to restore free movement. Reattach your cable ends, adjust your inline barrel adjusters to ensure you have roughly two to three millimeters of free-play wiggle room at the grip, and torque your housing bolts down securely.