
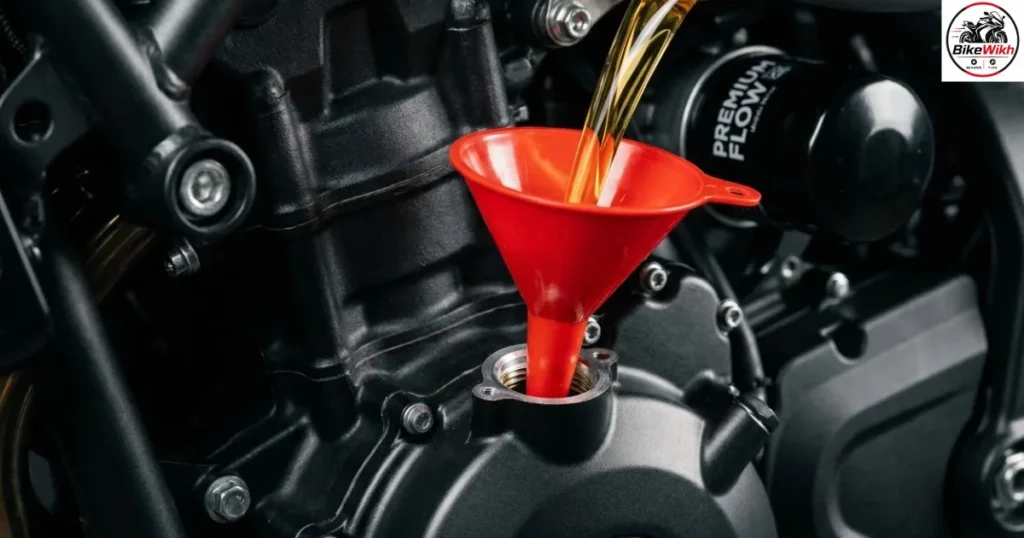
How to Change Your Motorcycle Engine Oil: Regular engine oil and filter changes are the single most critical maintenance task required to preserve your motorcycle’s long-term mechanical reliability. Engine oil plays a vital multi-functional role inside a high-revving motorcycle powerplant: it coats moving internal components to minimize friction, transfers intense combustion heat away from the piston walls, prevents internal rust formation, and suspends microscopic metal shavings away from your bearings. Because most motorcycles utilize a “wet clutch” system—where the transmission gears, clutch plates, and engine internals all share the exact same oil supply—your engine oil degrades much faster than standard automotive fluids.
Neglecting your oil schedules results in severe clutch slippage, rough gear shifting, accelerated piston ring wear, and eventual catastrophic engine failure.
Fortunately, mastering a professional-grade oil change at home is a simple DIY project that requires only basic hand tools and takes less than 30 minutes.
In this comprehensive BikeWikh garage guide, we outline the essential tool list, detail how to safely drain used oil, explain the proper replacement steps for your oil filter, and describe how to read your chassis sight glass to establish perfect fluid levels.
How to Change Your Motorcycle Engine Oil: Essential Garage Tools and Supplies Checklist
Before cracking open your oil pan drain plug, gather these specific materials to ensure a clean, smooth workspace:
- Premium Motorcycle-Specific Engine Oil: Ensure the fluid matches your owner’s manual specification exactly (e.g., 10W-40, 15W-50). It must feature a JASO MA or MA2 safety certification to guarantee compatibility with your bike’s wet clutch plates.
- OEM Replacement Oil Filter: Choose a premium cartridge or spin-on style filter designed precisely for your engine block model.
- New Crush Washer: Never reuse an old oil drain plug crush washer. A crushed washer loses its sealing properties, causing continuous low-pressure oil leaks onto your rear tire.
- Socket Wrench Set: For removing fairings and loosening the main oil pan drain plug.
- Dedicated Oil Filter Wrench: A strap wrench, end-cap socket tool, or filter pliers to safely break the factory seal loose.
- Low-Profile Oil Drain Pan: Sits flat under the motorcycle chassis to catch up to 4 quarts of spent oil without spilling.
- Funnel and Shop Rags: Keeps oil pouring clean and wipes up accidental drips immediately.
- High-Quality Torque Wrench: Critical for tightening the drain plug to exact factory foot-pound settings without stripping soft aluminum engine threads.
Preparation: Warming Up the Powertrain
To ensure you drain maximum contaminants out of the engine casing, start your motorcycle engine and let it idle in Neutral for 3 to 5 minutes. Warm oil has a significantly lower viscosity, allowing it to flow out of the tiny internal passages quickly while holding suspended carbon debris in solution.
Shut off the ignition entirely, pull the key, and let the bike sit for 2 minutes so the exhaust pipes cool down slightly to prevent skin burns. Place your motorcycle securely onto a flat paddock stand or center stand so the chassis sits perfectly vertical and level.
Draining the Spent Engine Oil
Locate the engine oil drain plug situated at the lowest point of your motorcycle’s bottom crankcase pan. Position your oil drain pan directly beneath the bolt.
Step 1: Remove the Oil Filler Cap
Locate and unscrew the plastic oil filler cap on the side of the engine casing. Removing this cap breaks the internal vacuum, allowing the used oil to drain out out of the bottom drain hole in a fast, smooth stream.
Step 2: Loosen the Drain Plug
Using the correct size socket wrench, carefully loosen the main drain plug bolt by turning it counterclockwise. As the bolt nears its final threads, press it lightly inward against the oil pan pressure, then quickly pull it away. This pro technique keeps hot oil from rushing down your arm.
[ Engine Oil Crankcase ]
│
▼ (Hot Oil Stream Flows Straight Down)
[ Oil Drain Pan ]
Step 3: Inspect the Drain Plug Magnet
While the oil drains completely into the pan (allow roughly 10 minutes), take a clean shop rag and wipe down your drain plug bolt. Most modern plugs feature an integrated tip magnet. Look closely at the metal particles captured on the tip: a fine gray metallic paste is completely normal engine wear, but large, jagged silver flakes or brass chunks indicate severe internal bearing failure. Slide the old deformed crush washer off the bolt and discard it.
- Replacing the Oil Filter
With the oil stream slowed down to a faint, occasional drip, move your drain pan slightly forward to capture the fluid released during filter removal.
- Spin-On Filters: Use your end-cap socket or filter strap wrench to spin the old canister counterclockwise. Be prepared for a surge of oil to escape from behind the filter mounting boss.
- Cartridge Filters: Remove the bolts securing the exterior aluminum oil filter cover panel. Carefully pull the paper element out, noting which direction the internal rubber grommet faces. Clean the inside of the housing using a lint-free rag and replace the rubber O-ring seal along the outer cover rim.
[Pro Tip: Pre-Lubricate the Seal]
Before spinning your brand-new oil filter canister onto the engine boss threads, dip a clean finger into fresh motorcycle oil and smear a thin film across the new filter’s black rubber gasket ring. This lubrication prevents the rubber seal from binding, twisting, or tearing as you tighten it, ensuring an absolute leak-free seal.
Spin the new filter on clockwise by hand until the rubber gasket makes solid, flush contact with the metal engine mating surface. From that exact point, turn the filter an additional 3/4 to 1 full turn by hand. Do not use an impact gun or leverage bars to over-tighten a spin-on filter, as you will warp the seal or crack the mounting threads.
- Sealing and Re-Filling the System
Slide a brand-new aluminum or copper crush washer onto your clean drain plug bolt. Thread the bolt into the bottom oil pan by hand to guarantee you do not cross-thread the delicate aluminum crankcase.
Take your torque wrench and tighten the drain plug bolt to the exact factory manual parameter (typically between 15 to 22 ft-lbs or 20-30 Nm).
Insert a clean funnel into your side oil filler neck and slowly pour in the exact volume of fresh certified engine oil specified by your manufacturer. Replace the oil filler cap firmly.
- Verifying the Final Fluid Levels
Start the motorcycle engine and let it idle quietly in Neutral for 60 seconds. While the engine runs, look beneath the frame rails with a flashlight to verify zero leaks are weeping from the drain plug or oil filter gasket. Shut off the ignition and let the bike sit for 3 minutes so the oil drains back into the lower reservoir pan.
[ Sight Glass Windows Guide ]
┌───────────────────────────────┐
│ [ ] ◄── Max Level Mark │ ◄── Oil level should rest exactly here
│ ┌─────┐ │
│ │~~~~~│ │
│ └─────┘ │
│ [ ] ◄── Min Level Mark │
└───────────────────────────────┘
Hold the motorcycle perfectly level and vertical (do not let it lean over on its side stand). Look closely at the transparent circular oil sight glass window located on the lower side of the engine casing:
- The Golden Rule: The clean oil line must rest exactly between the Upper (Max) and Lower (Min) indicator lines.
- If it sits below Min: Insert your funnel and add small 3-ounce increments of oil until the line balances centered.
- If it sits above Max: You have overfilled the system, which will cause high pressure, frothing, and oil blow-by into your airbox. Use a clean syringe to siphon out the excess fluid.
How to Change Your Motorcycle Engine Oil: Quick-Reference Oil Service Troubleshooting Matrix
| Technical Issue Noted | Potential Root Mechanical Cause | Corrective DIY Action Required |
| Oil Weeping From Drain Plug | Old crush washer reused or bolt under-torqued | Tighten to exact manual spec or replace crush washer |
| Oil Pressure Light Stays ON | Low fluid level or massive internal air pocket | Shut off engine instantly; check sight glass volume |
| Dark Black Oil After 50 Miles | Normal carbon cleaning properties of fresh detergent | None; the oil is successfully cleaning the internal engine blocks |
| Milky White / Frothy Oil Appearance | Engine coolant leaking internally into the oil pan loop | Do not ride. Blown head gasket needs instant mechanic repair |
Conclusion: Clean Oil Equals Long Life
Investing 20 minutes into executing a meticulous oil and filter swap is the single best insurance policy you can buy for your motorcycle’s high-performance parallel-twin, V-twin, or inline-four engine block. By sticking strictly to factory mileage parameters, choosing high-quality JASO MA2 certified lubricants, tracking your sight glass indicator lines, and ensuring every drain plug utilizes a fresh, tight crush washer, you keep your transmission shifts buttery smooth and ensure your bike runs beautifully for thousands of miles to come. Keep your garage tools clean, log your oil change dates in your maintenance diary, and keep your browsers locked onto BikeWikh for more expert DIY garage guides!