
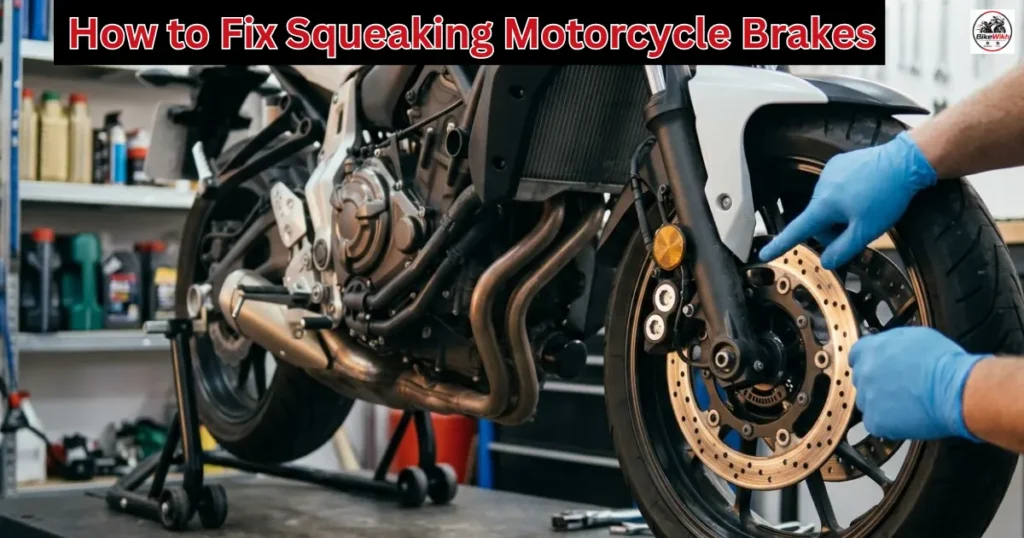
How to Fix Squeaking Motorcycle Brakes: There are few things more annoying—and potentially alarming—than hitting the front brake lever or pressing the rear foot pedal only to be met with a loud, high-pitched squeak or metal grinding screech. For motorcycle owners, noisy brakes are an incredibly common headache. While a squeaking noise can sometimes be a harmless cosmetic nuisance caused by minor dust, it can also serve as a critical early warning sign of severe brake pad degradation or structural component failure.
Operating a motorcycle with compromised braking components drastically increases your stopping distances, risks scoring your expensive brake rotors, and directly compromises your safety on the road. Fortunately, diagnosing and fixing squeaking brakes is a highly manageable DIY task you can perform in your garage.
In this comprehensive BikeWikh maintenance guide, we break down the root causes behind brake noise, how to inspect your calipers, and step-by-step strategies to silence the squeak.
How to Fix Squeaking Motorcycle Brakes: Understanding the Mechanics: Why Do Brakes Squeak?
Brake squeak is fundamentally caused by high-frequency harmonic vibrations. When you apply brake pressure, the hydraulic caliper pistons push your brake pads tightly against the spinning metal disc rotor. If there is any microscopic play, uneven surface friction, or debris trapped in this interface, the components will vibrate rapidly against each other, acting like a giant violin bow that produces a screeching noise.
The most common real-world causes behind these vibrations include:
- Accumulated Brake Dust & Road Dirt: As brake pads wear down, they drop a fine carbon dust matrix. Combined with road sand and mud, this creates an uneven glazed layer on the pads.
- Brake Pad Glazing: Extended hard braking down long hills can cause extreme thermal heat buildup. This melts the top friction layer of the brake pad into a smooth, glassy, mirrored surface that slips and squeaks against the rotor.
- Worn Down to the Wear Indicators: Most premium brake pads feature integrated metal wear clips. When your pad material gets dangerously thin, this metal tab rubs directly against the disc to intentionally make a loud screeching noise, alerting you that a replacement is due.
How to Fix Squeaking Motorcycle Brakes: Step-by-Step DIY Guide to Silence Your Brakes
Step 1: Perform a Visual Wear Inspection
Before spraying any cleaning chemicals, you must verify that your pads still possess adequate friction material.
- The Check: Use a flashlight to look straight down inside the brake caliper housing. Look at the pad material pressed against the rotor. If the friction material measures less than 2 mm in thickness, or if the central indicator groove has completely vanished, your pads are fully worn out. Stop troubleshooting and install a fresh set of brake pads immediately.
Step 2: Perform a Deep Chemical Brake Clean
If your pads have plenty of life left, dust contamination is your primary suspect.
- The Action: Secure your bike on its center stand or paddock stand. Generously spray a dedicated, fast-evaporating Brake Cleaner Spray directly over the brake caliper assembly, the internal pads, and across both faces of the circular disc rotor.
- The Wipe: Take a clean, lint-free microfiber shop towel and wipe down the rotor surface vigorously. You will see an immediate transfer of dark, oily carbon grime onto the rag. Spin the wheel by hand and repeat until the metal face looks completely bright and clean.
Step 3: De-Glaze the Brake Pads and Disc
If a chemical wash doesn’t quiet the system, your pads have likely developed a hard heat glaze layer.
- Remove the Pads: Unbolt your brake caliper mounting pins using your socket wrench set, slide the caliper off the rotor, and pop the brake pads out of their retention clips.
- Sanding the Friction Material: Place a sheet of medium 150-grit or 180-grit sandpaper flat on a smooth garage workbench table. Lay the brake pad face-down on the paper and move it in a gentle figure-eight motion with light hand pressure. Sand just enough to scrub away the shiny, mirrored glaze layer, revealing a fresh, rough, matte grey pad texture.
- Scuff the Rotors: Use a fresh piece of sandpaper to lightly scuff the outer ring of your bike’s metal disc rotor in a circular direction. This breaks up any old pad transfer residue baked onto the metal.
Step 4: Apply Anti-Squeal Paste to the Pad Backing Plate
This is the ultimate pro-mechanic secret that silences 90% of stubborn brake vibrations.
- The Application: Clean the metal rear backing plates of your brake pads thoroughly. Apply a very thin, even layer of high-temperature Brake Anti-Squeal Paste (or high-temp copper grease) directly to the back of the pads where the circular hydraulic caliper pistons push against them.
- CRITICAL WARNING: Never, under any circumstances, allow anti-squeal paste, grease, or oil chemicals to touch the front friction side of the brake pad or the disc rotor face. Getting oil products on the friction material will permanently ruin the pads, destroy your braking power, and create a lethal riding hazard.
Step 5: Reassemble and Bed-In Your Brakes
Pop the quieted pads back inside the caliper brackets, slide the assembly cleanly over the disc rotor, and torque your mounting bolts back down tightly according to your manufacturer specifications.
- Pump the Lever: Before starting the bike, pump your front brake handlebar lever and rear foot pedal 5 to 6 times to re-seat the hydraulic pistons.
- The Bed-In Process: Take a slow test ride down a quiet neighborhood street. Accelerate to 30 mph, then apply steady, smooth brake pressure to slow down to 5 mph (without coming to a complete stop). Repeat this deceleration loop 5 times to evenly transfer a fresh, quiet layer of pad material onto your sanded rotors.
Brake Noise Diagnostic Matrix
| Type of Noise | Probable Mechanical Issue | Immediate Action Required |
|---|---|---|
| High-pitched light squealing | Accumulated road dust or light pad glazing | Perform chemical flush and scuff pads with sandpaper |
| Heavy ticking or clicking | Loose caliper hardware or anti-rattle clip missing | Inspect and tighten mounting bolts; replace missing clips |
| Harsh metallic grinding | Material 100% gone; steel backing plate hitting rotor | Stop riding immediately; replace destroyed pads and warped disc |
Conclusion
Fixing noisy motorcycle brakes doesn’t require an expensive trip to a dealership. By systematically cleaning away carbon dust, sanding down hard heat glaze spots, and carefully applying high-temp anti-squeal paste to the rear backing plates, you eliminate the micro-vibrations that cause annoying screeches. Keep your friction surfaces completely free of grease, monitor your pad thickness lines regularly, and enjoy smooth, quiet, and responsive stopping power on every single ride!